
Free download (74 MB) Previous versions
- Version
- 2026.13.1
- Developer
- Flixel Photos Inc.
- Languages
- English, German, Spanish, Italian, Chinese (Traditional), Chinese (Simplified), Portuguese, French, Japanese
- License type
- K'ed by TNT team
| macOS range | macOS 15.6 or later |
|---|---|
| Chip | Apple Silicon, Intel 64-bit |
| Download | 74 MB |
| Previous versions | 2 on file |
Screenshots
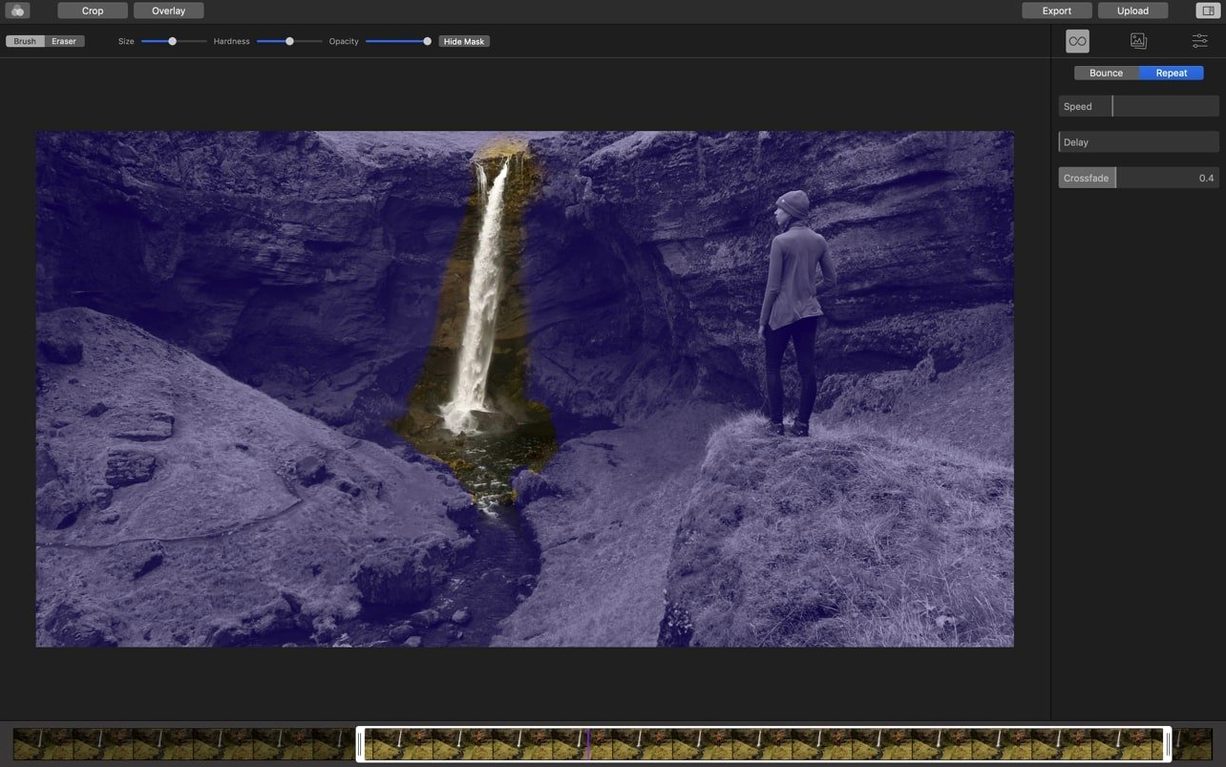
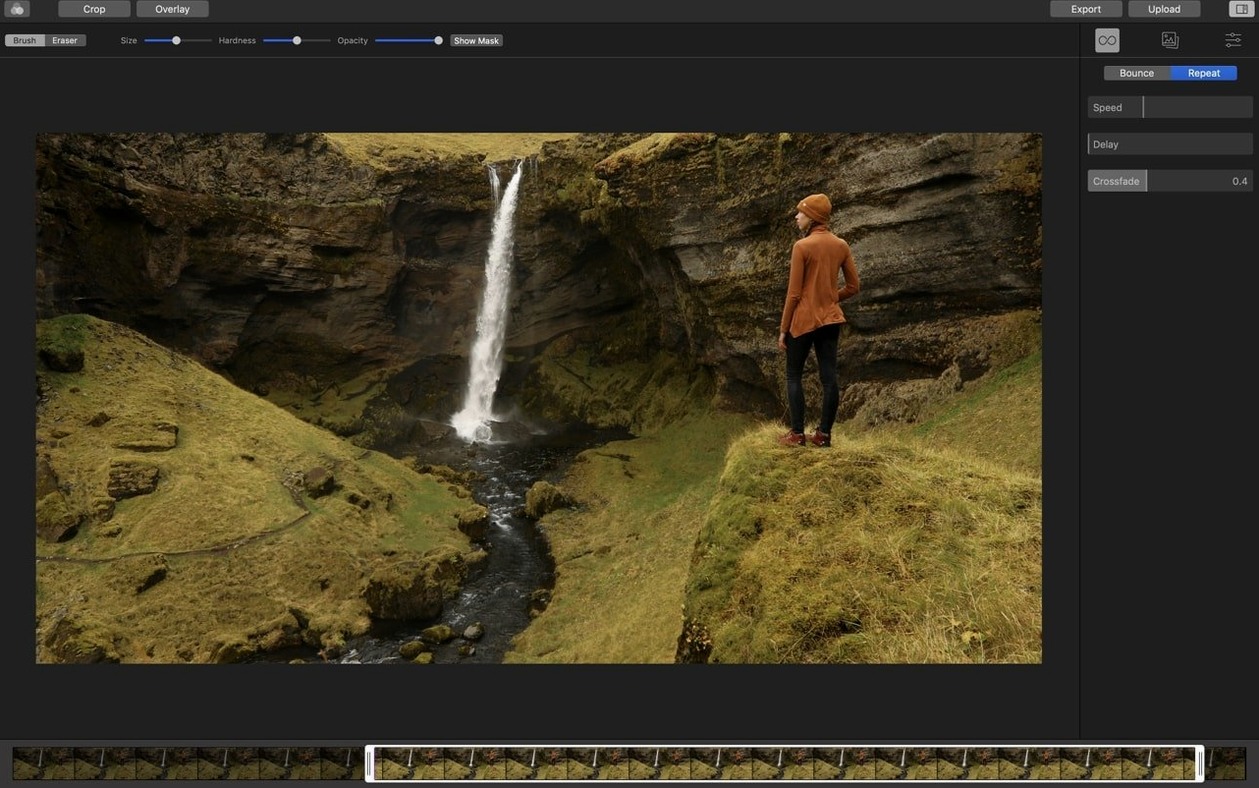
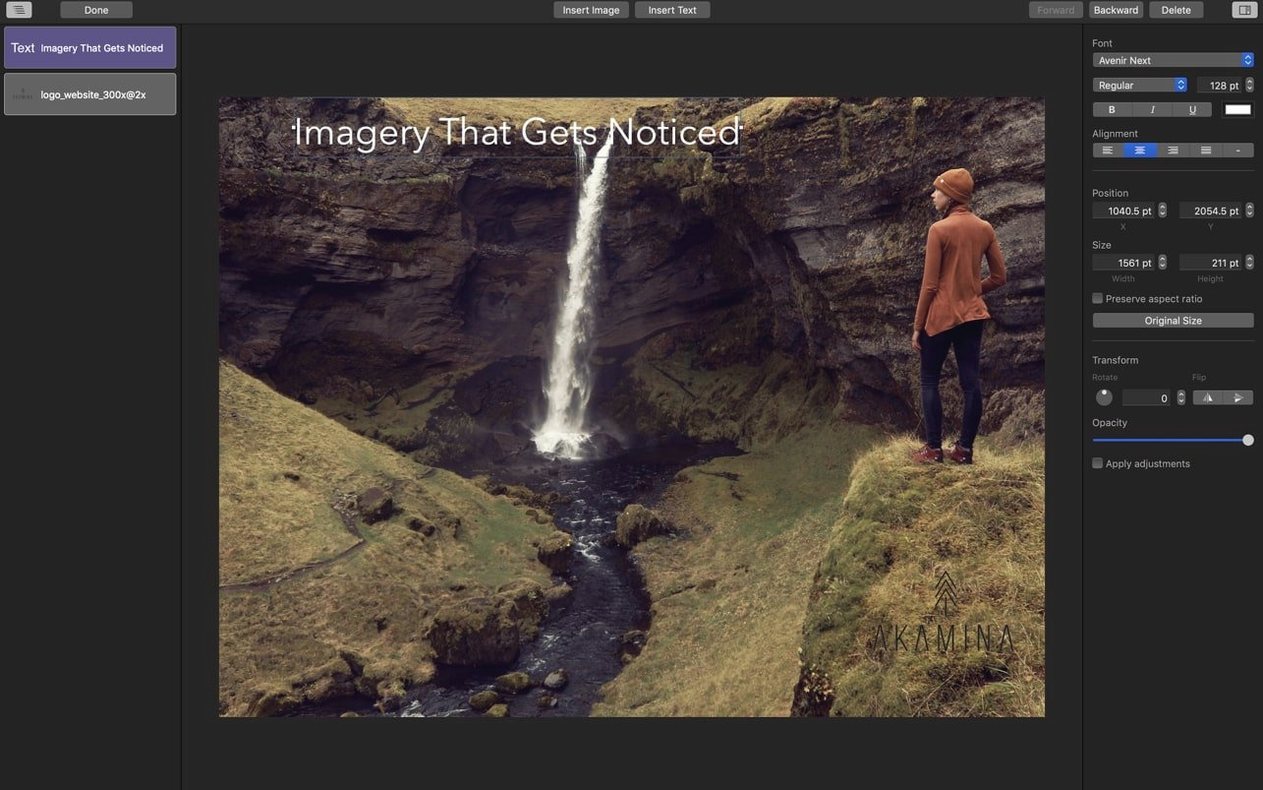
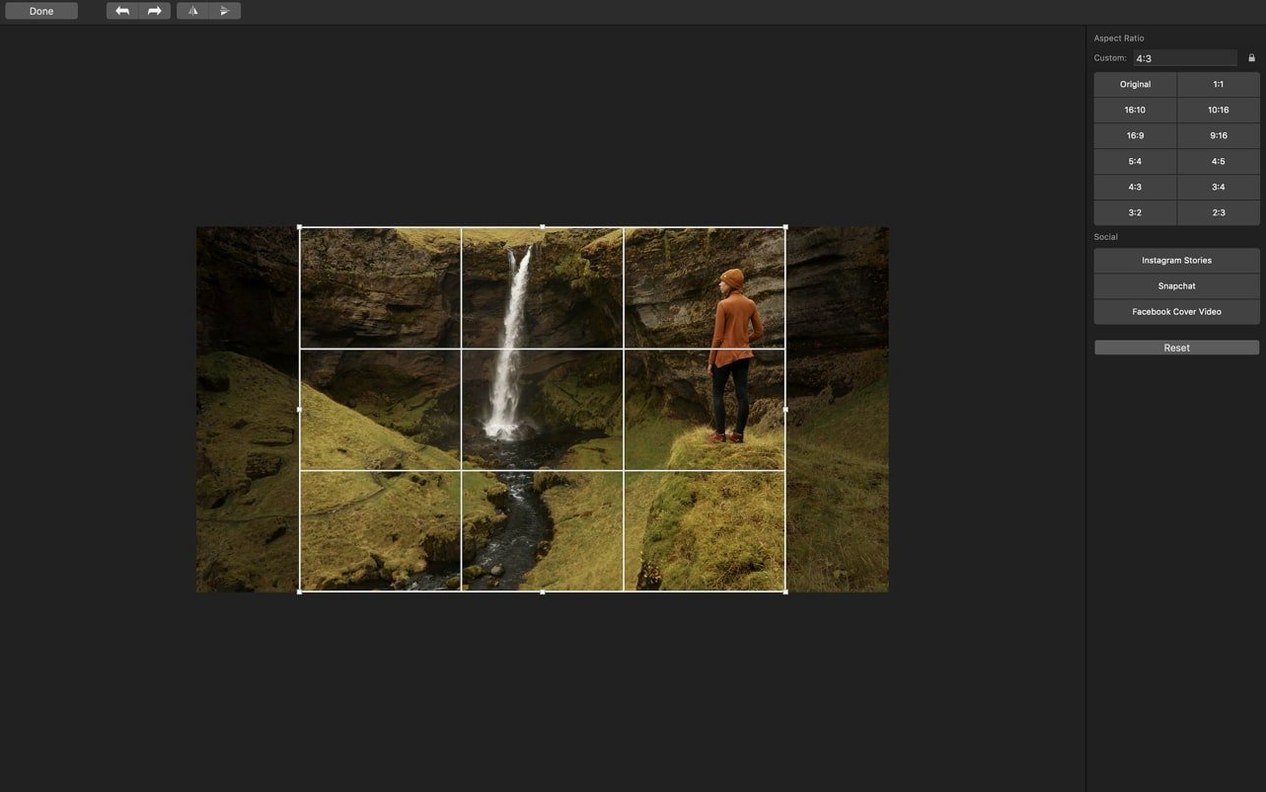
Click a screenshot to see it wider.
The live masking tool is where Cinemagraph Pro starts to make sense. You draw on a still frame and see the motion region update in real time. That immediate feedback is the quickest way to learn how a cinemagraph behaves.
Good for:
- Choosing a single still frame as the base image, then painting motion back in.
- Using bounce or repeat loop playback to fine-tune the motion cycle.
- Crop, rotate, and straighten tools to frame the shot before exporting.
Keep in mind:
- The app runs on both Apple Silicon and Intel 64-bit Macs, but requires macOS 15.6.
- Interface languages include English, German, Spanish, Italian, and five others.
- Flixel also sells an iOS version — the same file format works across devices.
Bounce loop to hide repeats
Open Preferences before you import anything. Two things save time later:
- Loop behavior. The default is a straight repeat. If your clip has a natural cycle, set it to bounce. That reverses the playback on each loop and hides the jump point better.
- Export format. If you work with social media teams, set H.264 as the default. If you need to hand off to video editors, switch to ProRes 422. GIF is only for quick previews or legacy platforms.
Turn on iCloud Drive in the app's preferences if you move files between your Mac and an iPad or iPhone. Cinemagraph Pro saves project packages, not single files, so iCloud syncs the whole thing without broken links.
Export with ProRes 4444 alpha for Final Cut
Cinemagraph Pro works well as part of a larger pipeline. You do not need to do everything inside it.
- Final Cut Pro or DaVinci Resolve. Export from Cinemagraph Pro as ProRes 4444 with an alpha channel. That lets you drop the cinemagraph over a timeline as a moving overlay. No re-rendering needed.
- Photos app. Drag a still frame from Photos into Cinemagraph Pro to use as the base image. The app reads the standard formats Photos exports.
- QuickTime Player. Open a trimmed clip in QuickTime to check loop points before importing into Cinemagraph Pro. Saves a round trip.
- Finder Quick Actions. You can set Cinemagraph Pro as the default app for video clips you shoot on a tripod. Right-click a clip and choose Quick Look to preview the motion before committing to a project.
The app respects macOS window management. Snap it to half screen and keep a Finder window or reference image on the other side. No special setup required.
Mask steam around a still coffee cup
You shot a short clip of steam rising from a coffee cup on a tripod. The cup is still. The steam moves. Here is how the session runs:
- Import the clip. Drag the .mov file from Finder into the app. The timeline loads the full clip.
- Trim the loop. You know the steam cycles every two seconds. Drag the in and out points to that range. Play it once to confirm the motion looks natural.
- Pick the still frame. Scrub to a frame where the cup is sharp and the background is clean. The app uses that as the frozen base.
- Mask the motion. Switch to the live masking tool. Paint over the steam area on the still frame. The motion region lights up immediately. If the mask bleeds into the cup, undo and paint a smaller stroke. Real-time feedback means you see the mistake right away, not after a render.
- Set loop type. For steam, bounce works better than repeat. The steam rises and falls back naturally. Bounce hides the cut.
- Crop the frame. The coffee cup is off-center. Use the crop tool to reframe it. Straighten if the horizon is tilted.
- Add text or an overlay. If the cinemagraph is for social media, drop a logo or a short caption as an overlay layer. Adjust the opacity so it does not fight the motion.
- Export. Choose H.264 for Instagram or ProRes 422 for a client deliverable. The export runs in the background. You can start another project while it finishes.
The whole process takes about ten minutes once you have the clip. The live masking step is the only part that takes practice. After a few sessions, you learn to paint small and let the loop do the work.
- macOS 15.6 or later
- Intel 64-bit or Apple Silicon
Questions I get about this line
Yes, it supports both Apple Silicon and Intel 64-bit Macs running macOS 15.6.
The install order
- Mount the disk image and launch the Open Gatekeeper friendly package.
- Press Enter to bypass Gatekeeper in Terminal when prompted.
- Drag the app to the Applications folder.
- Open the app once installation finishes.